There are very few people who don’t know about slide calipers, but more people who don’t know about them properly. Most linear dimension measurements can be performed with them. To start learning about precision measurement, one must first learn about the slide caliper. Most slide calipers contain two jaws for external dimension measurement, two jaws for internal dimension measurement, one guiding rod for depth measurement, a ruler, etc. There’s a sliding part that contains one internal and one external measurement jaw. On top of it, we’ll find a screw to fix the sliding part in position to check the measured dimension. This is the structure of a basic slide caliper. In this article, we’ll cover the following details:
- Types of slide calipers based on data output
- What can we measure
- How to measure
Types of slide calipers based on data output:
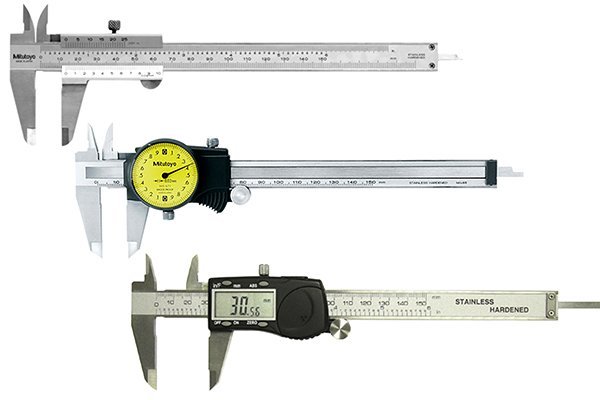
Usually, there are three types of slide calipers: manual, dial, and digital. They all look the same, but the change lies in the data output system. In the manual type, there’s a vernier scale attached to the sliding part. Some people, especially those who have just started learning about it, find it difficult to use. We’ll discuss this process later in this article. This type of slide caliper doesn’t require any external power source. The dial type is another one that doesn’t require any power source, and it’s easier to take measurements compared to manual slide calipers. It contains a dial like a clock on the sliding part with an indicator. Dimensions are marked on the dial which varies according to the range. The digital slide caliper is the most advanced of them all and it doesn’t need any effort to take dimensions as it shows in digits.
What can we measure:
Slide calipers are basically used to take linear dimensions. They are used to determine the distance between two faces or points. Length, width, thickness, slot gap, even diameter can also be measured by a slide caliper. If we talk about physical objects, let’s take a plumbing pipe for example. We can measure the external diameter, internal diameter, and using these two dimensions, we can determine the thickness of the pipe. Let’s take another object, a bolt. We can measure its head diameter, screw length, etc. And for a nut, we can determine the depth of the thread. So, almost every linear dimension can be measured by a slide caliper using the right range. Yes, range is a very important part of any measurement tool. Of course, you cannot just have an 8-inch slide caliper and wish to measure a 12-inch product, just like you cannot attach two metal parts using pliers.
How to measure:
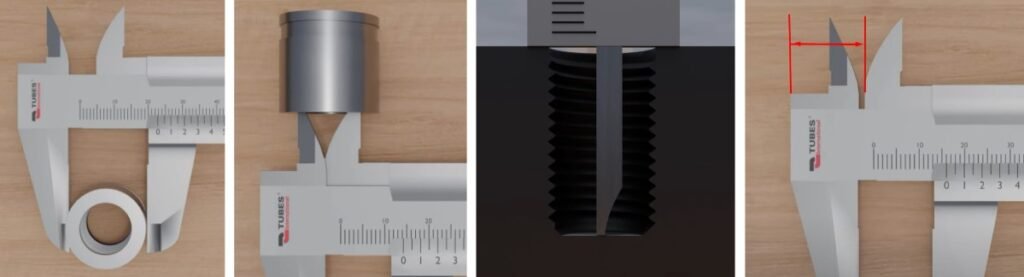
There are four ways to take dimensions, and that depends on the job type that we need data for. The lower jaws, which are the larger ones, are used for external data measurement. The upper ones are used for internal data measurement. The depth gauge is used for depth measurement. And finally, the fourth one, which few people know about, is the side face of the jaws.
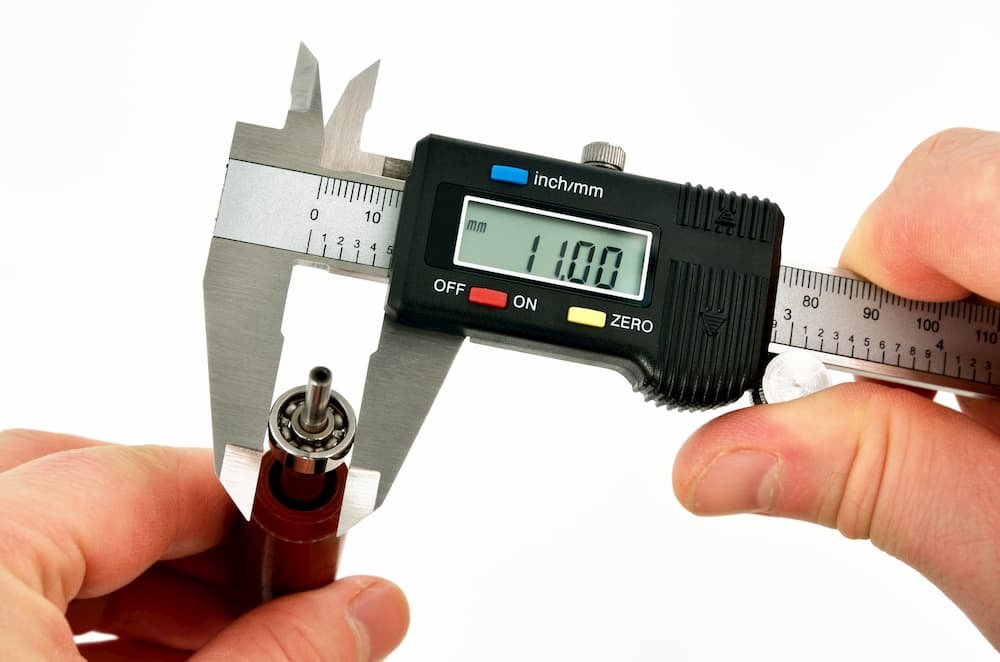
From the previous discussion, we already know that a digital slide caliper shows data directly in digits. Often, it allows up to two decimal numbers for millimeters and up to four decimal numbers for inches. Only a digital slide caliper allows you to switch from mm to inch and vice versa directly from the tool just by using a button. You hold the object as shown in the images, and the tool will provide you with the dimensions. As easy as that.
Dial slide calipers are slightly different from digital ones. As I said before, it has a dial with an indicator. Measurement positions are marked on the dial. Most of the time, it contains only mm or inch values, but some of them may be marked with both. By holding the jaws onto an object, the indicator will show the dimension on the dial.
Coming down to manual slide calipers, some people, mostly the younger generation, don’t like to use manual slide calipers as they need some further attention to determine the data. We already know that there are two scales on a manual slide caliper. One is the main ruler and the other is the vernier scale. The markings on the vernier caliper range from 0 to 10. After holding the object, the operator has to determine two pieces of data: the position on the main ruler where the 0 of the vernier scale has just crossed and then find a line on the vernier scale that is in line with the main ruler. Adding up these two positions will give the final data.

That’s all about a slide caliper. Now, using the same principle, there are many other tools such as depth gauges, chamfer gauges, etc. These are based on the same rule with different aspects. That’s another day’s discussion.